Hands-On Apple 239 transcript
Please be advised that this transcript is AI-generated and may not be word-for-word. Time codes refer to the approximate times in the ad-free version of the show.
Mikah Sargent [00:00:00]:
Every photo your iPhone takes has a look, a set of decisions about contrast, about color, about skin tone that Apple has made for you. But maybe those photos read a little flat to you or your skin never looks quite bright. Well, photographic styles is how you take that decision back. And on recent iPhones, it goes way beyond filters. Today, it's all about finding your look. Stay tuned. Podcasts you love from people you trust. This is twit.
Mikah Sargent [00:00:42]:
Welcome to Hands on Apple. I am Micah Sargent and today we are taking a look at a feature that Apple has added to the iPhone that give you the ability to change the overall look and feel of your photos. Now, this system is going to be different depending on what kind of iPhone you have. So there's sort of an original system and then the link generation system and the original system which is available from the iPhone 13 all the way through the iPhone 15. It also includes the iPhone SE and the iPhone 16E. We're going to see, and we'll look at this in a moment, five different presets for your photographic styles. But on these older model phones, there's one catch that you need to be aware of. That style that you choose is baked into the photo at capture.
Mikah Sargent [00:01:31]:
So that means that when you take the photo, it's there. There's no one doing it later. The cool thing is on later generation phones like the iPhone 16 and 17 series, although this does not include the 16e or the 17e styles that understand, depth is also something that's there, as well as adjusting the skin tone separately from the background instead of just putting one filter over everything. And it's not a filter because the camera is kind of preserving the natural color relationships in the scene, the way that the photo changes and then it just changes how the skin looks. It doesn't actually affect everything else. On top of that, these latest generation models also are not baked in. So it's a really cool feature that way as well. All right, so let's go ahead and take a look at what, what we need to do on our phone to actually set up our photographic style.
Mikah Sargent [00:02:32]:
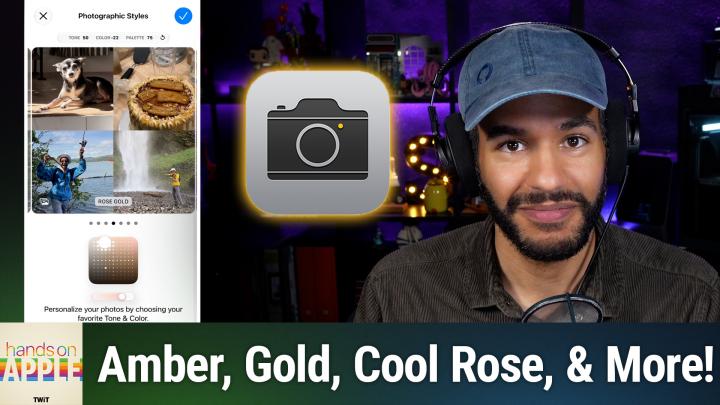
Heading over to iOS for this. So here we are on iOS and we want to launch the settings app. From there we're going to choose camera and you'll see an option that says photographic styles. If you do not see this in your phone, it is likely that you have a phone that is older and therefore does not support photographic styles, but a newer phone does. You'll note also that I have a photographic style chosen. The options for undertone include amber, gold, Rose gold, bright neutral and cool rose. And we'll take a look at those in just a moment. So if we tap on photographic styles again, you'll note that I have amber selected.
Mikah Sargent [00:03:09]:
Now, if you have photos in your photos app, then those photos will appear here and give you an idea of how these photos look in different forms. So to start out, we've got the default or the standard and this is as a, according to Apple, the default iPhone camera look balanced and true to life. The amber option accentuates amber undertones and you can see how that appears in some of these photos. Gold accentuates gold undertones. Rose gold accentuates rose gold undertones. Bright will actually brighten skin tones. And then it says applies a pop of vibrance across the photo. Neutral will neutralize warm undertones.
Mikah Sargent [00:03:50]:
And cool rose accentuates cool rose undertones. Each of these is a change to the way mostly that undertones in skin appear. And it's the fact that different people perceive the photos of themselves in different ways and may want to appear differently. And so this gives you the ability to make a different choice for how you want to look. So it's not just about accuracy. Now, the cool thing is you can take one of these options and you can customize it and doing so will change the tone, color and palette of the choice. So I'm going to leave amber alone because that's the one that I use the most. But let's choose rose gold and we're going to customize this.
Mikah Sargent [00:04:39]:
Now you'll see that you have this sort of rather square or squircle down at the bottom. And these are going to change the overall kind of look and feel. It's a control pad essentially. So in order to kind of fine tune the tone, the color and the palette of the photo, you are going to use this control pad. Dragging vertically will change the tone. So up and down makes a difference to how the tone changes. And tone is representative of the kind of bright to dark, as you can see, options for this photo. And then horizontal changes the color so you can see that it is a more washed out or muted photo to a more saturated photo.
Mikah Sargent [00:05:32]:
And then the slider beneath is essentially responsible for the intensity of the overall application of this tuning. I recommend that when you're setting this up, setting everything to zero will give you the ability to tap somewhere and see how that presents itself. So if we drop it all the way to the middle, which is the 000 whoops, then we can go essentially give you some grace here. Then you can move from here to how you may want that. And it's so nice to be able to then take this and make a choice on how you want your photos to look. We can reset this to standard for that specific st. Of course going to go back to Amber. In fact, I'll just close out of that so that it doesn't change it for me because Amber is my choice for photographic style.
Mikah Sargent [00:06:31]:
Good thing to know you can change your mind at any time by going back into those photographic styles and making a change. But you need to do that if you have an older model iPhone on the latest generation you can actually adjust photographic styles after the fact. You open the photo, you tap edit, you tap styles and then you can just swap out a style or fine tune with that control pad the style that you have. But it only works if your photos are captured in high efficiency formats. So go to settings, go to camera, choose formats and make sure that you have high efficiency, high efficiency under camera capture. Otherwise you won't have the ability to take away the photographic style. As far as the styles option appearing on older model phones or why it's not there, it's simply that again the the camera pipeline isn't capable of capturing that style separately, displaying everything that it needs to display to you and then giving you the ability to change it afterwards. So that is where you won't be able to change it after the fact on older model phones, but you can on newer model phones.
Mikah Sargent [00:07:46]:
So people have asked. We'll continue to do so some homework for you. Head into settings, camera, photographic styles and then go the undertone picker with your own photos. It takes like two minutes to choose. Pick the one that looks like you know the you that you recognize. You can, you can actually customize and select photos completely of your face and use that as your, you know your your stepping off point there. Take photos with it for a week and then if you've got an iPhone 16 or later, you know that nothing's permanent so you can continue to experiment with those. But if you do have an older model phone, don't forget to change it back if you decide you don't like the color and overlap overall feel of the photo.
Mikah Sargent [00:08:27]:
In any case, I want to thank you so much for tuning in to this week's episode of Hands on Apple. I'll be back next week with another episode. Until then though, it is time to say goodbye to all of you.